Call Now (704)448-6884
Repair kitchen drain leaking inside the wall
Welcome back to Happi Plumbing Channel. Today’s case will focus on the place we are very familiar with. That is, the kitchen. Let’s see how to fix the kitchen drain leak inside the wall.
Client Issue: There is a leak in the crawlspace.
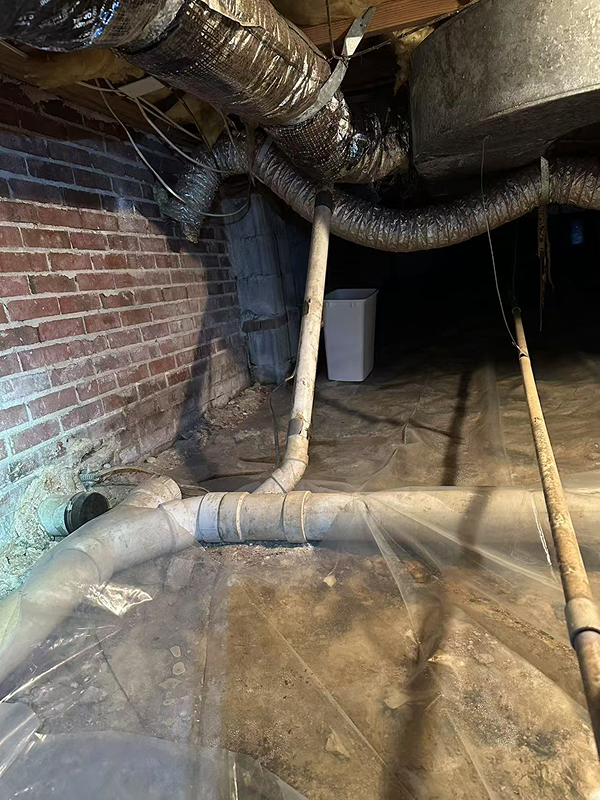
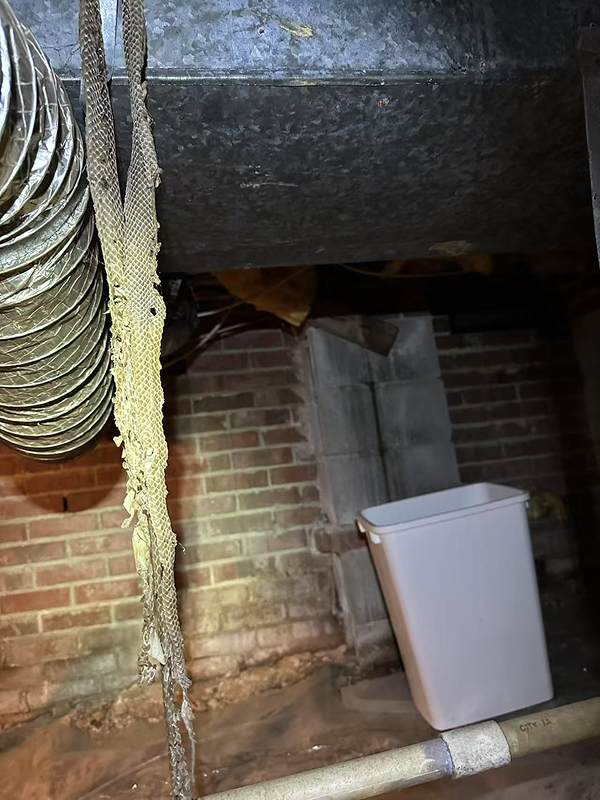
Step 1: Leak detection in the crawlspace
By bypassing the snake’s shedding and following the sound of dripping water, we traced the leak to the kitchen drain.
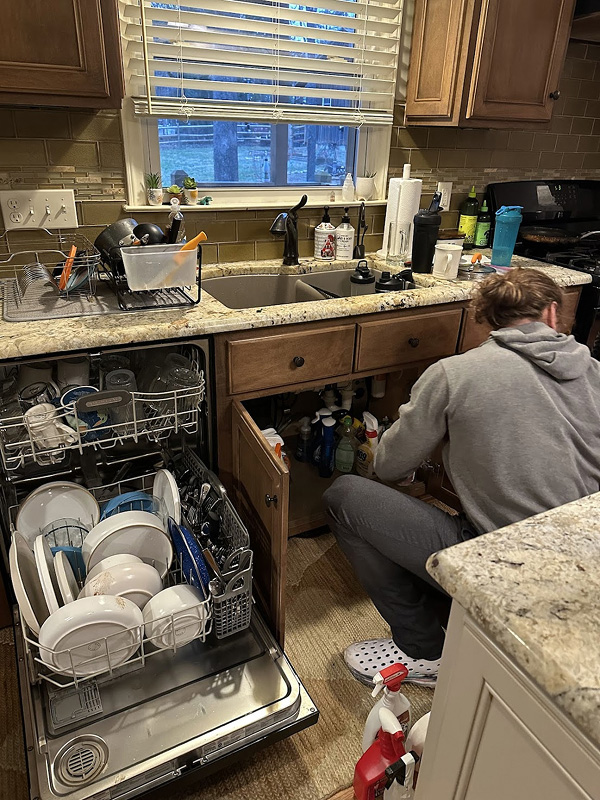
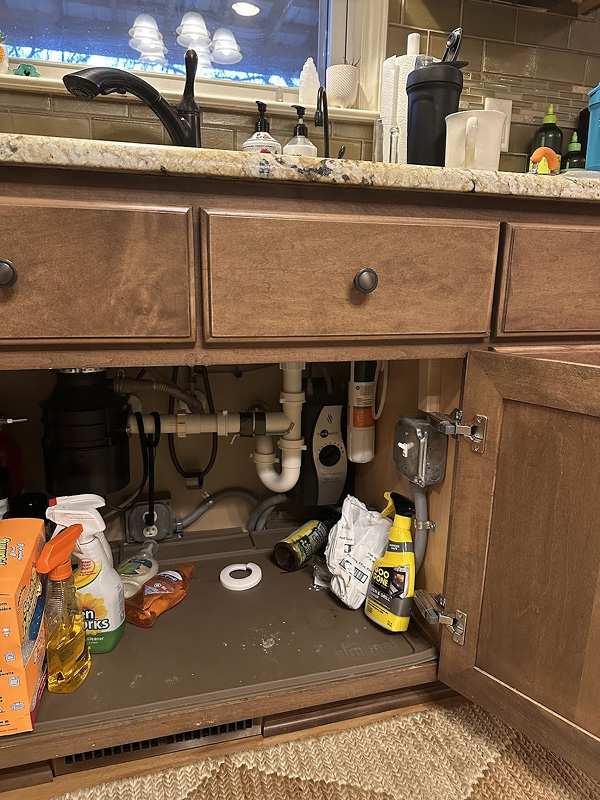
Step 2: Cleaned the kitchen cabinet and located the leak in the kitchen drain
We cleared the area around the kitchen cabinet to check for the source of the leak in the kitchen drain.
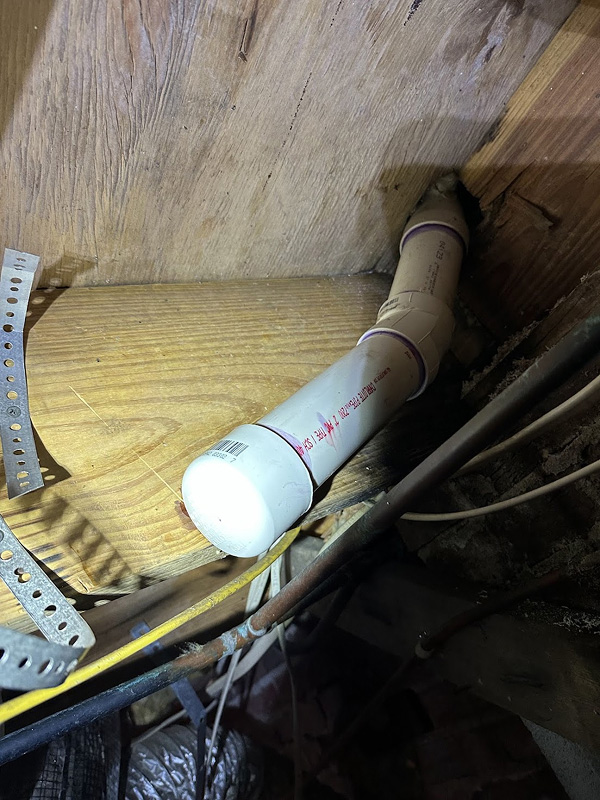
Step 3: Clear insulation around the drain pipe
Upon inspection, we found that the leak was coming from the hub of a 45-degree elbow fitting. During the initial installation, primer was not used before applying glue, which caused the joint to lose its seal over time and start leaking.
Step 4: Decided to replace the fitting to solve the leak
We chose to replace the fitting to fix the leak issue.
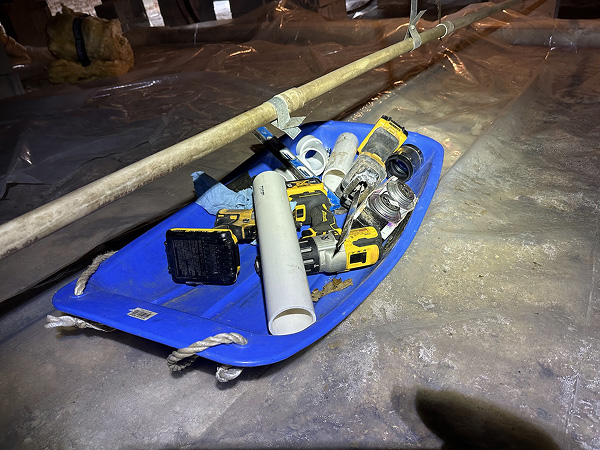
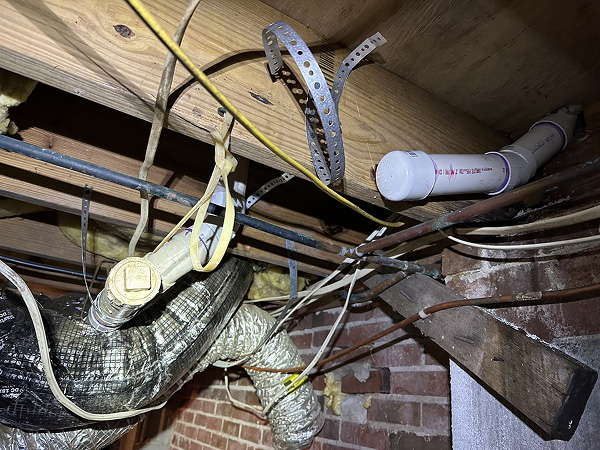
Step 5: Used a sled to pull tools into the crawlspace
Tip: Working in a crawlspace, especially a very low one, can be difficult when crawling in and out. I prefer using a sled to transport all the tools and materials to the work area in one go.
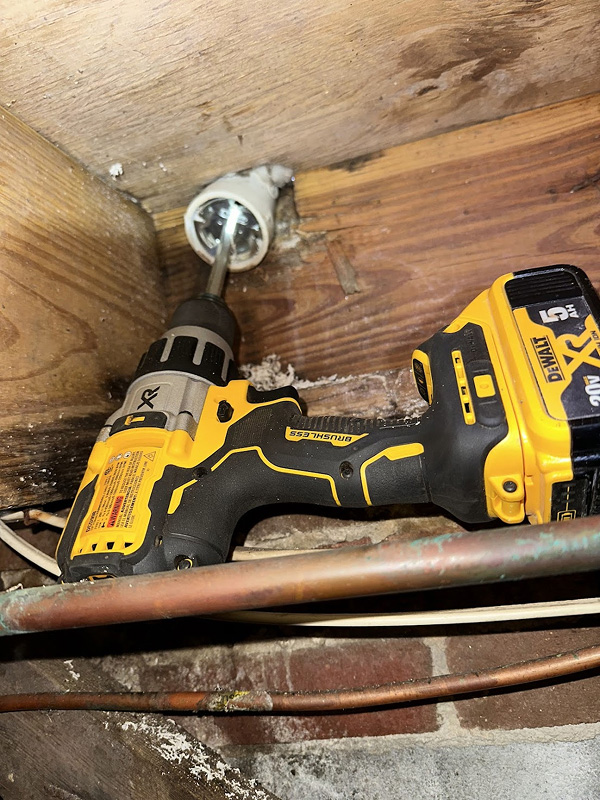
Step 6: Cut the leaking PVC pipe
We used a socket saver tool to clean out the debris from the hub.
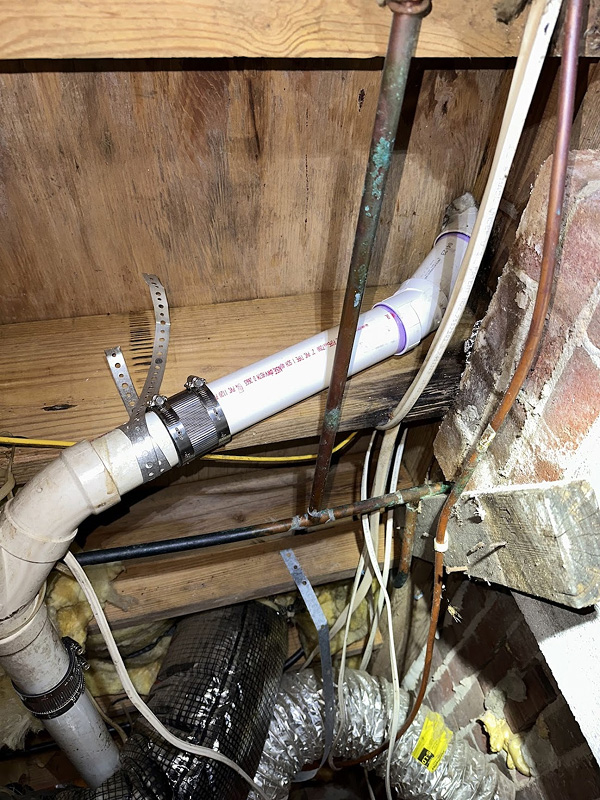
Step 7: Reconnect the kitchen drain line
We reconnected the kitchen drain line after replacing the faulty fitting.
Step 8: Applied primer and glue, waited for 1 hour, then tested by turning on the kitchen faucet
When we tested it, there was still dripping, indicating the leak was higher up in the wall.
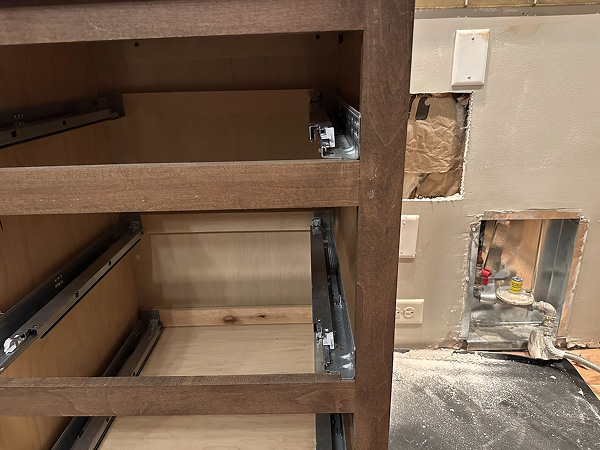
Step 9: Cut open the drywall
Upon opening the wall, we found the kitchen drain was behind the cabinet. The client didn’t want to damage the kitchen cabinet, so we decided on a new approach—drilling a hole in the bottom of the cabinet to reroute the kitchen drain.
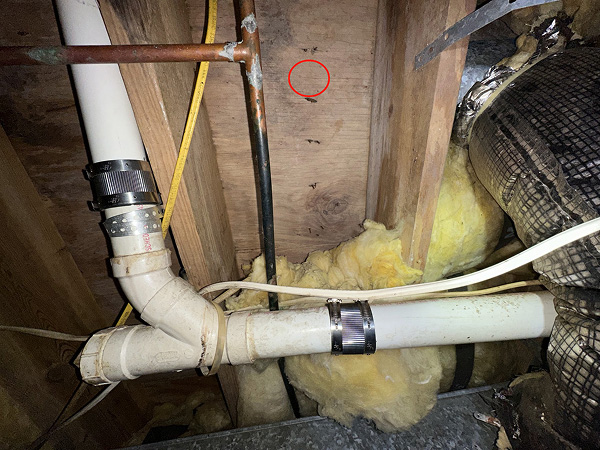
Step 10: Carefully measured and located the hole in the red circle section
We measured carefully and drilled at the location marked with a red circle.
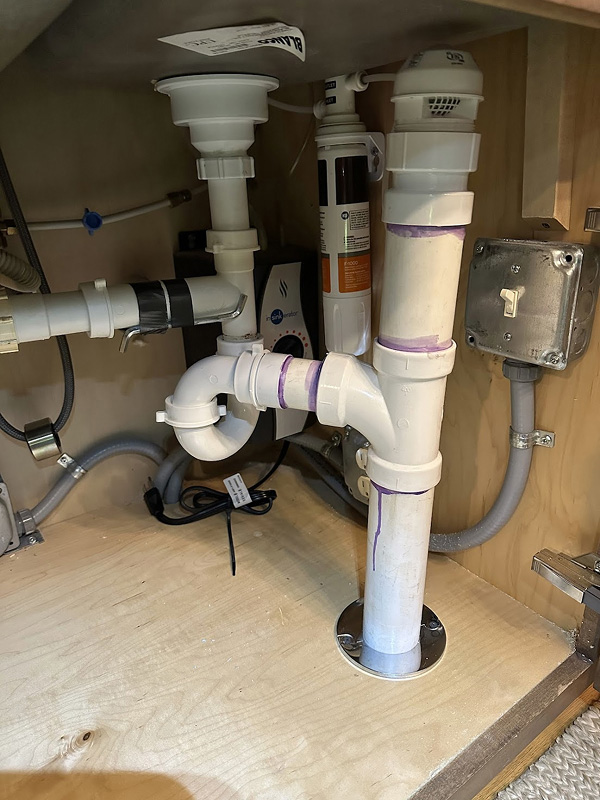
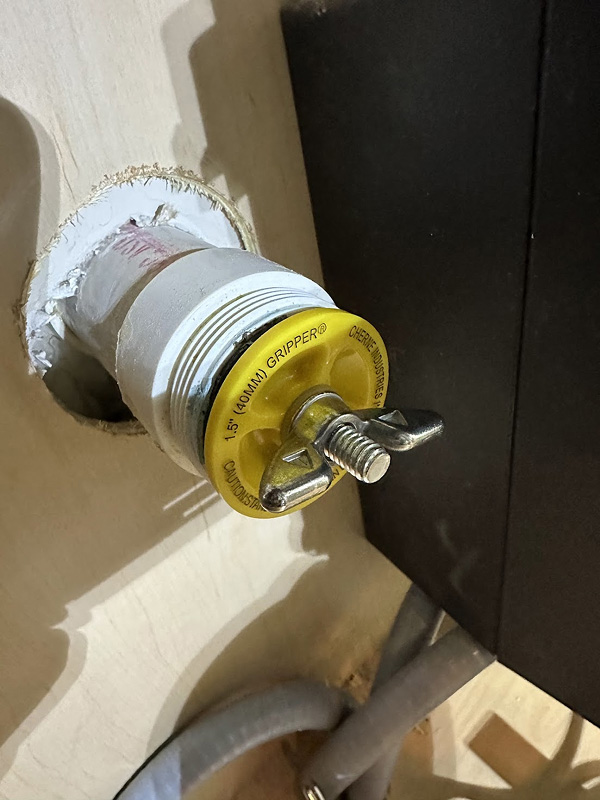
Step 11: Repiped the kitchen drain after drilling the hole
We installed a Studor vent and reconnected the P-trap, using a hole plate to seal the hole.
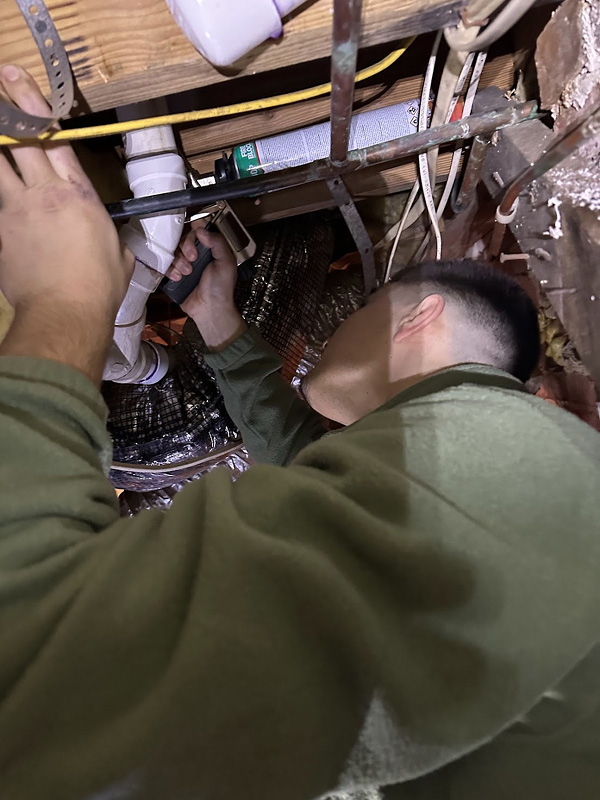
Step 12: Sealed the hole from the crawlspace
We sealed the hole properly from the crawlspace side.
Step 13: Plugged the old kitchen drain and Capped the old vent
Step 14: Supported the new line with strapping
We secured the new line with straps to ensure proper support.
Step 15: Tested again after waiting 1 hour for the glue to set
After an hour, we tested the system again, and there were no leaks.

Finally, we restored the padding under the kitchen sink, leaving everything clean and tidy. The leak was fixed, and the client was very, very happy! We were so happi to help.
今天再给各位朋友分享一个案例:如何重排墙内漏水的厨房下水道!
客户问题:crawlspace 里有漏水
- 在crawlspace检测漏水. 绕过蛇的蜕皮,顺着滴水的声音,发现漏水是来自厨房下水管。
- 清理橱柜,查找厨房下水管的漏水点
- 清理下水管的insulation, 观察发现漏水是从the hub of one 45 turn fitting, 安装时,在涂胶水之前没有使用primer ,导致时间长了以后,接头开始密封不严而漏水
- 决定采用更换接头的方案,解决漏水问题
- 用雪橇板,把工具拉进 小贴士Tips: 在crawlspace 作业,特别是在非常低矮的crawlspace, 爬进爬出非常不便,我喜欢用一个雪橇,把工具和材料都一次性运输到工作位置。

